Introduction:
In this blog post, we have captured the details about browser extensions through which we will translate the any web page.
For language translation we have used the azure translator service as shown below:

The browser translation extension divided into parts:
1. Setup translator service in azure.
2. Consume translation service in app using rest API.
Setup Translator Service in Azure
1. Go to https://portal.azure.com/
2. Search for Translator

3. Upon Click below screen will appears:

4. Now click create and fill the required details as shown below:
Resource Group - You need to select the resource group, or you can create your own.
Region - I have kept the region as global but you use different as per business needs.
Pricing Tier – I have selected the free one, but you can select different based on business needs.


5. Now click on “Review + Create”

After this, click on “Create” button.
6.Once you click on create you get a screen which will show status as in progress. Wait for few seconds.
Once you get below screen the click on below highlight button:

7. After clicking, you get the below screen:

Here you can test the few translations.
Till this point we have set up the translations service in azure. Now to use this in browser extension we will use REST API services provided for translations as shown below:

Now will create browser extension using the above OPEN REST API service.
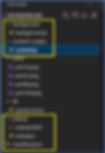
To create browser extension, we need to setup the files as shown below:

In browser extension, manifest.json place important roles and below are the few details about manifest file:
· Name – the name of the extension.
· Version – the version of the browser extension.
· Description - description of the extension.
· Permissions – we can define the different browser area access.
· Background – this we have added to achieve the custom functionality with custom UI.
· ICONS – images for extension
· Action – keep as it is shown in image.
· Content scripts – additional scripts which we want to load.
Our final goal is to achieve translation UI like below:

For above UI below files contains code:
1. content.js – This helps to show the translation UI as popup as highlighted with YELLOW arrow. The content. js function triggers from background.js
2. Popup.html – This helps us to show information UI as highlighted with RED Arrow. Along with this we have popup.js which triggers the event when we click the “Start Widget” button.
3. Content.js – This file contains code to call azure cognitive service API as shown below:

You can download the code from below UI directory:
Once files are set properly then we need to load the files in browser and :
1. Click on below highlighted part

2. Click on below highlighted and select the folder in which we have added all the files such as menifest.json and other folders:

Upon clicking, you get prompt to select the folder. I have kept all files under extension code folder as shown below:

hence I have selected the below folder:

After upload, it will looks like below:
